INK MIZER

Refill cartridges, Epson Canon equivalent inks, CIS, Continuous ink systems, Chip Resetter, T-shirt Press, Flat Press, Digital Press, Mug Press, Mouse Pads, Mural Software, Sublimation Software, Cottonmate Dark Opaque Transfer Paper and Cottonmate Light Hot Peel Transfer Paper. Call us at 208-920-9736 or email us at inkmizer@inkmizer.com

  Site Map    Link to us    Links    Blogs    Techies
Home

Refill Cartridges
Large Format Cartridges
Bulk Ink Systems CISS

Epson Ink
Canon Ink
HP Ink

Print Head Clog Buster
Printer Accessories

Transfer Software
Transfer Papers
Discount Deals
Instructional Videos
Testimonies
Missions
Contact


How to unplug Epson print heads.

Plan A

There are a number of ways that the print heads can be cleaned. The first way that I have always tried is to put 5-10 drops of Print Head Clog Buster onto the docking station that the print head comes to rest on when the printer is turned off. Be very careful not to allow the solvent to overflow the edge of the pad. If it becomes flooded, it will run below onto sensitive electronic components. If you overfill the pad you can also create a perfect siphon at the print head and it can actually cause the cartridges or bulk feed system to drain into the waste pad in the bottom of the printer.
To accomplish this you must first push the paper eject button for 3 seconds in order to get the print head to move off of the docking station. Now, unplug the printer. Go ahead and slide the head over to the left. This will now give you the freedom to access the pad to place the solvent onto it. Do not touch the docking station because it is held in place with very delicate springs and once these springs are damaged, the printer is history.
Now go ahead and plug the printer in and turn it off, so that the print head will dip itself into the Print Head Clog Buster. Let it sit overnight. Doing this process will solve the majority of the plugged head problems. To see if you were successful, do a print head test. No Success? Do a print head cleaning and print head test and do this at least 3 times. If this does not work the first time, repeat the above process at least 2 more times, each time waiting overnight. Be patient. It's cheaper than sending the printer to Epson.


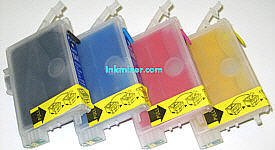
Plan B

If you were unsuccessful with the above steps, this would probably be your next step. Purchase a set of Cleaning cartridges and install them into the printer. Be sure to return the print head to the right and allow them to sit without use for a 1/2 hour. This will allow any air to dissipate upward into the cartridge where it will not effect the printer. Perform at least 3 print head cleanings cycles doing a print head nozzle check between each cleaning. You must do a print head nozzle check between each cleaning cycle in order to gain the maximum potential of the cleaning process. Again this will require a little patience because if it does not immediately open the nozzles, you will have to let it sit overnight to allow the blockage to dissolve. If by the second day you still have no success then this is where patience will have to rule. I have left printers sit for as long as 3 weeks with the Cleaning cartridges left in the printer, but not doing anything with the printer but simply let it sit and allow the Print Head Clog Buster to slowly dissolve the plugged nozzles. I know this is a long time to wait but it's either that or take out a second mortgage on the house and take it to Epson. I had a stubborn Epson 3000 that I tried everything but the sledge hammer and finally parked it with the cleaning cartridges for the 3 weeks and voila, tried it, and it worked like a new machine.

Do you have a complete nozzle check but some nozzle appear to fire off to one side?

This is usually due to pet hair, dust bunnies or dryer lint clinging to the underside of the print head and as the nozzles are firing the ink droplet hits the hair, diverting the flow of ink to one side.
Take a paper towel and cut it in half. Carefully fold it so that it becomes a long narrow strip about 1/2" to 3/4" wide, soak it in Print Head Clog Buster (Not dripping wet, remember there are very sensitive electronics that you might soak out if the solvent runs below). Now, place this paper towel into the printer across the print head path, the black plastic area that has the high ridges. Again you will have to follow the steps in Plan A to be able to slide the print head back and forth. You might have a little difficulty sliding the head from left to right and back again. If this is a problem, then you are having difficulty getting the print head to start across the paper towel because it is unable to climb up over the end of the paper towel. Push the print head all the way to the start point and push a small amount of the paper towel beyond the plastic rail and push it down into the printer's lower area. This should allow you to slide the head back and forth. If you still can't, then simply reduce the size of your paper towel. Once you are able to do this, go ahead and move the print head back and forth for a few minutes. This will clean any nasty deposits that have gummed up the bottom of the head. You might have to repeat this a few times if your head is really dirty. Be careful to not leave the print head sitting on the paper towel unattended in the printer because you will end up wicking all of the cleaning fluid or ink out of the cartridges into the paper towel. Click on the links below for photo of docking stations
Epson Stylus Color 890, 900, 1270, 1280, 1290, 1290S Docking Station
Epson Stylus Color 900, 980 Docking Station
Epson Stylus C66, C68, C84, C86, C88 Docking Station
Epson Stylus Photo R200, R220, R300, R300M, R320, R340, R800, R1800

Copyright information.... This article is free for reproduction but must be reproduced in its entirety along with live links & this copyright statement must be included. Visit http://www.inkmizer.com  for free printer tech advice, web development articles, tutorials and tools! Affiliate ads do not have to be included.

Other products you may like.


Print Head Clog Buster


Epson Stylus Color, Epson Stylus Photo and Epson Wide Format Cleaning Cartridges